

DIY Step by step cardboard fans to decorate your party
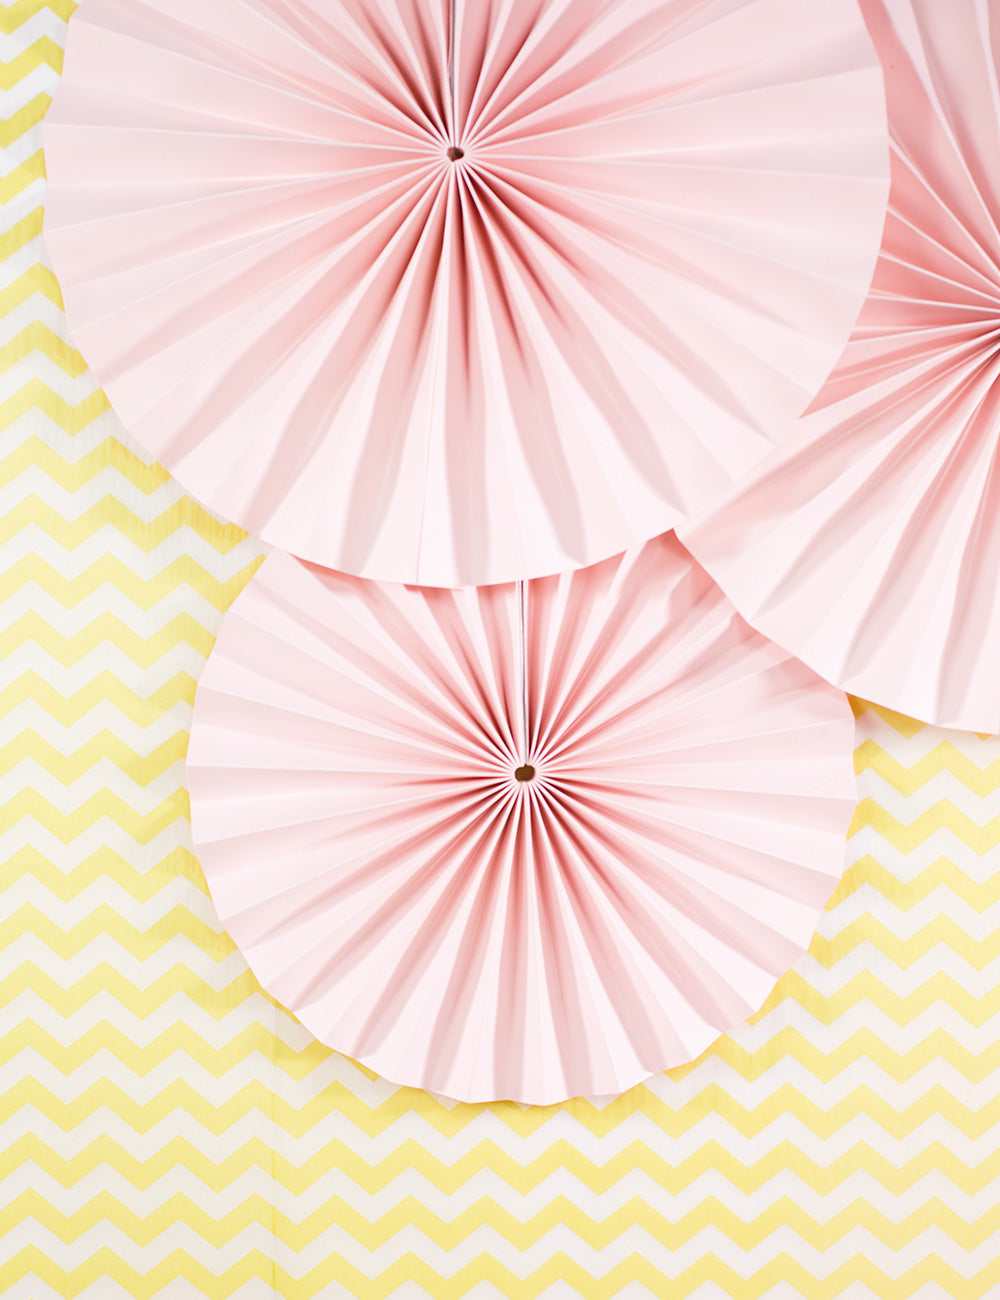
Fans are becoming more and more fashionable in party decoration. Pinterest is full of them and they have become a must-have as they are perfect for decorating the back wall of a party table or a Photocall background. They are an alternative to Pom Poms or balloons and best of all, they fill large surfaces with color.
I love them, because in addition to decorating, they are ecological and economical. Being so easy to assemble and disassemble, you can save them and use them as many times as you want.
We can find fans in tissue paper, cardboard, plain colors, printed and die-cut. At Olivia's Party we have a lot of fan options of different colors, shapes, and textures so that you can combine and create your own composition.
Tip: The fans work very well to decorate large vertical surfaces , but if what we want is to decorate a room, ceilings or an open space and we have the idea of hanging them in the center, the effect is not as spectacular, they will rotate without stopping. To decorate these areas, there are other elements that are much more suitable and that will give us a better result, such as garlands of fans , crepe paper ribbons , pennants or balloons .
For the most motivated, I leave you a step by step with the materials and all the steps that you can make your own cardboard fans. You will see that it is very easy and the result is brutal.
Materials
1 sheet of cardboard in the color of your choicetransparent zeal
Long rule (Better if it is metallic)
4 clips
Fishing line if you want to hang them
Double-sided tape or circles of silicone glue if you prefer to stick them directly to the wall.
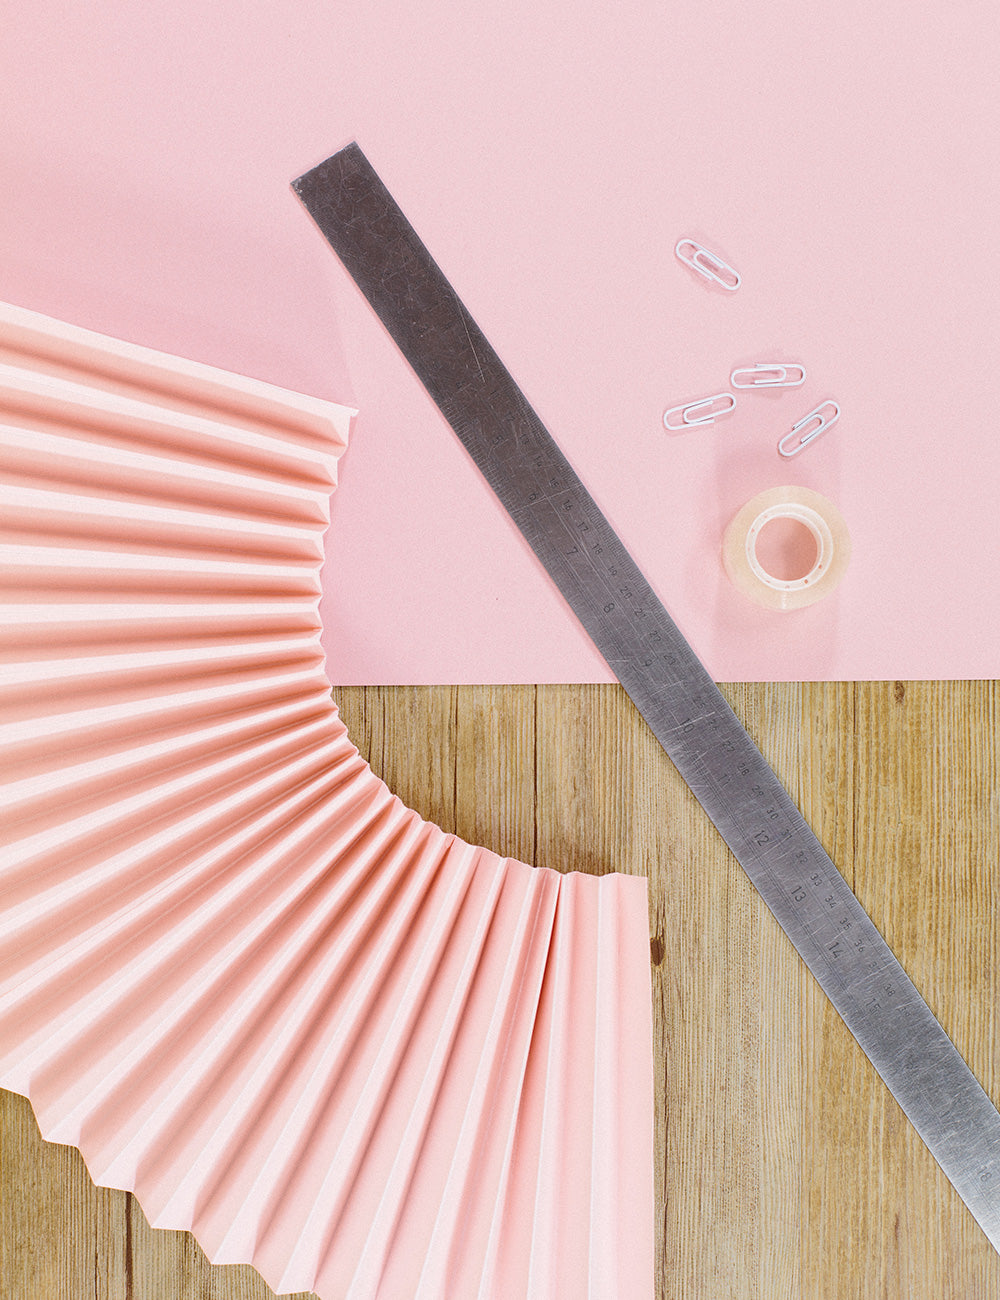
Step 1
Cut the sheet of cardstock in half, thus creating two strips of cardstock. The width of each piece will mark the diameter of our fan , the ideal is always to combine at least two sizes.
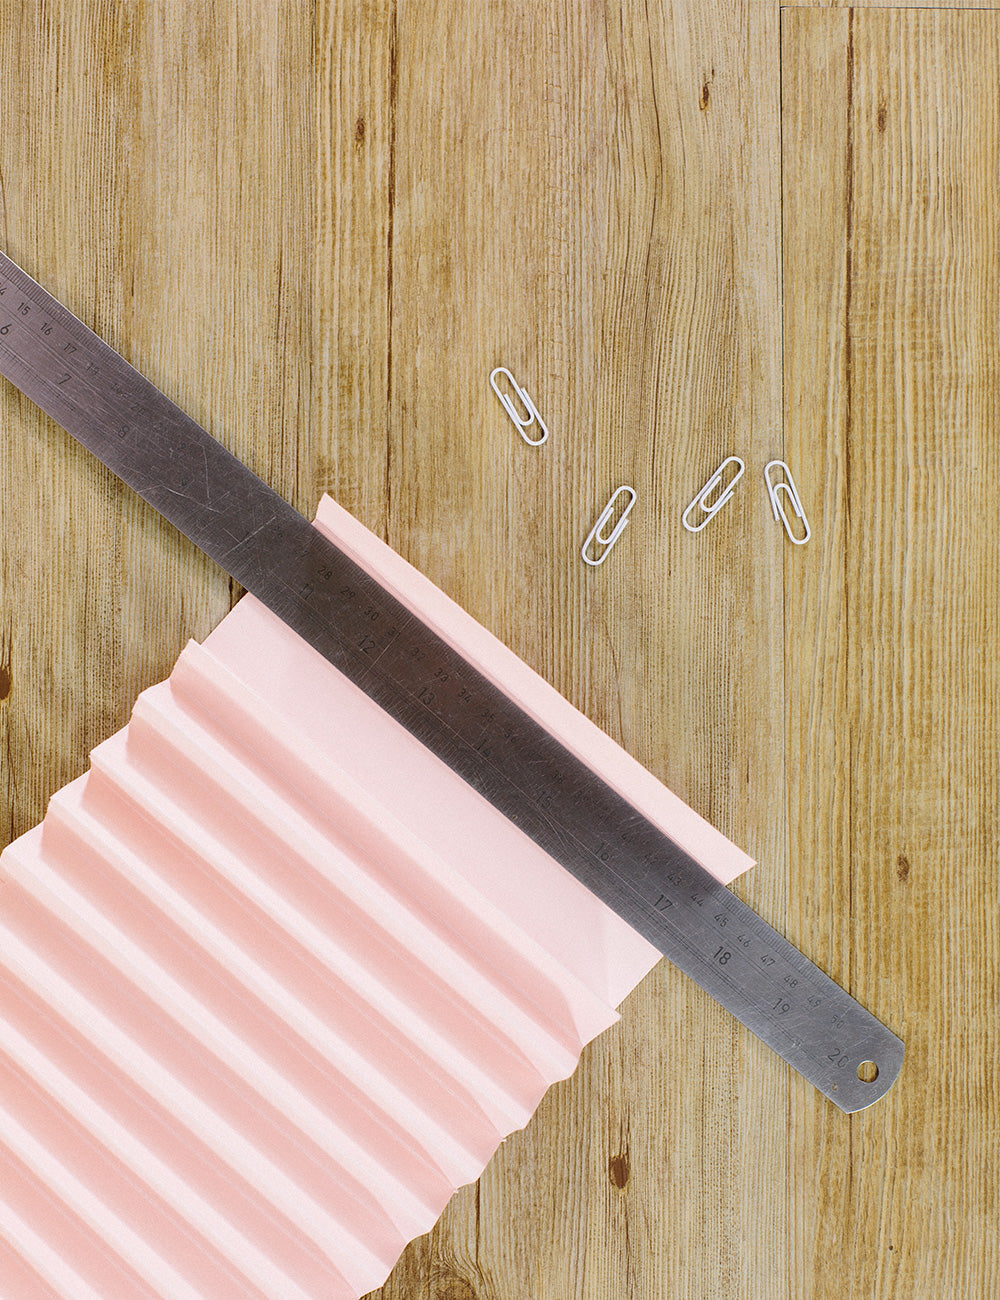
Step 2
Mark at the beginning of the cardboard strip 1.5 cm for the reference hem. Now fold your cardboard like an accordion in the shape of a Zig-Zag. If the cardboard is very thick, help yourself with a metal ruler to press harder. Try to keep the hems even.
Step 3
Once you have both strips folded like "a ballerina's skirt," glue them together into one long accordion-folded strip.
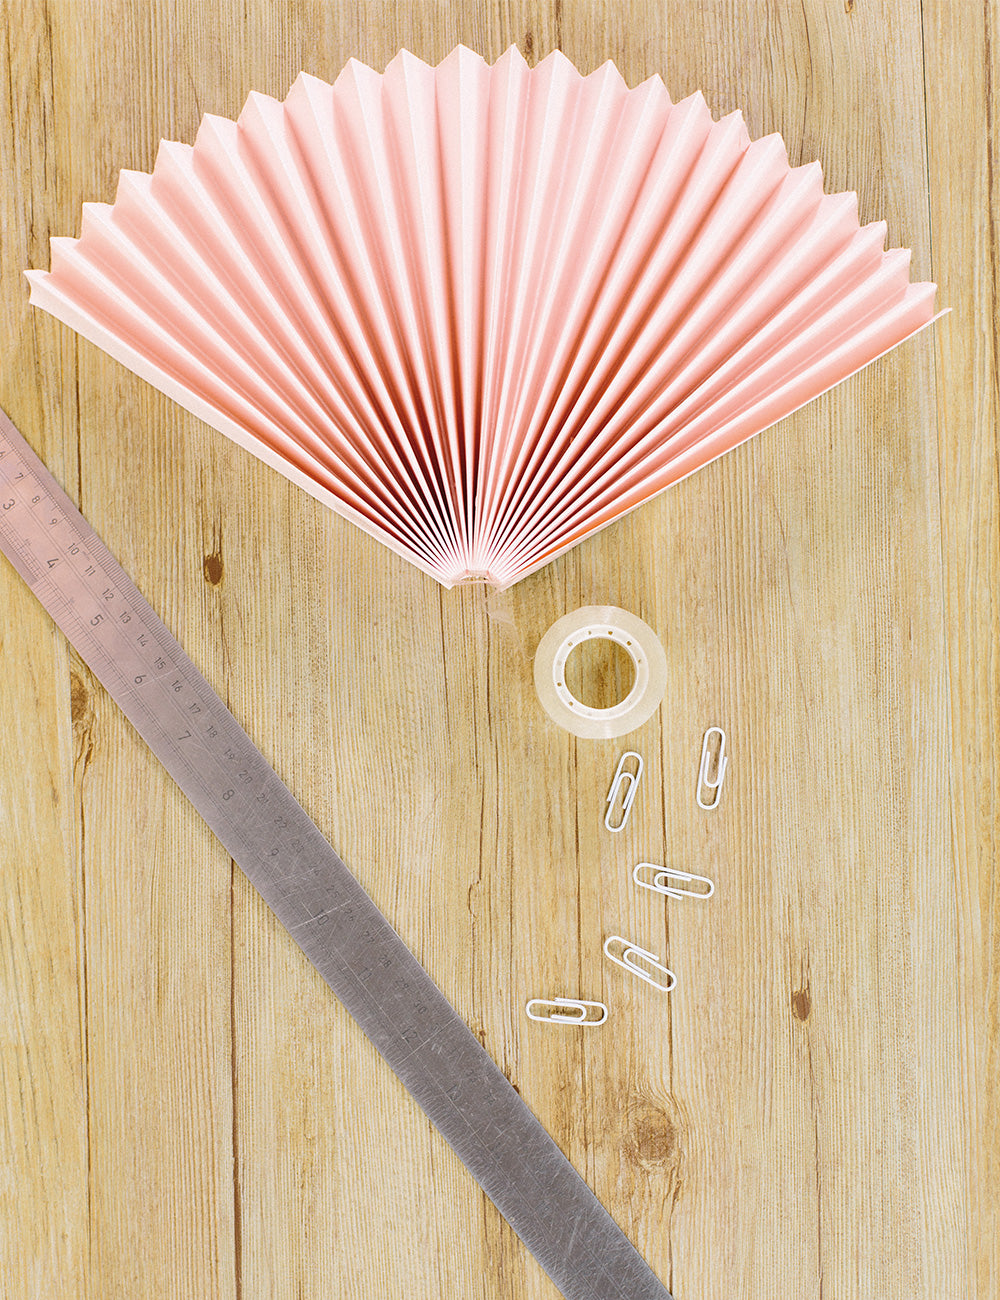
Step 4
Now glue the tip of your accordion with tape in the shape of a U, thus generating a hinge.
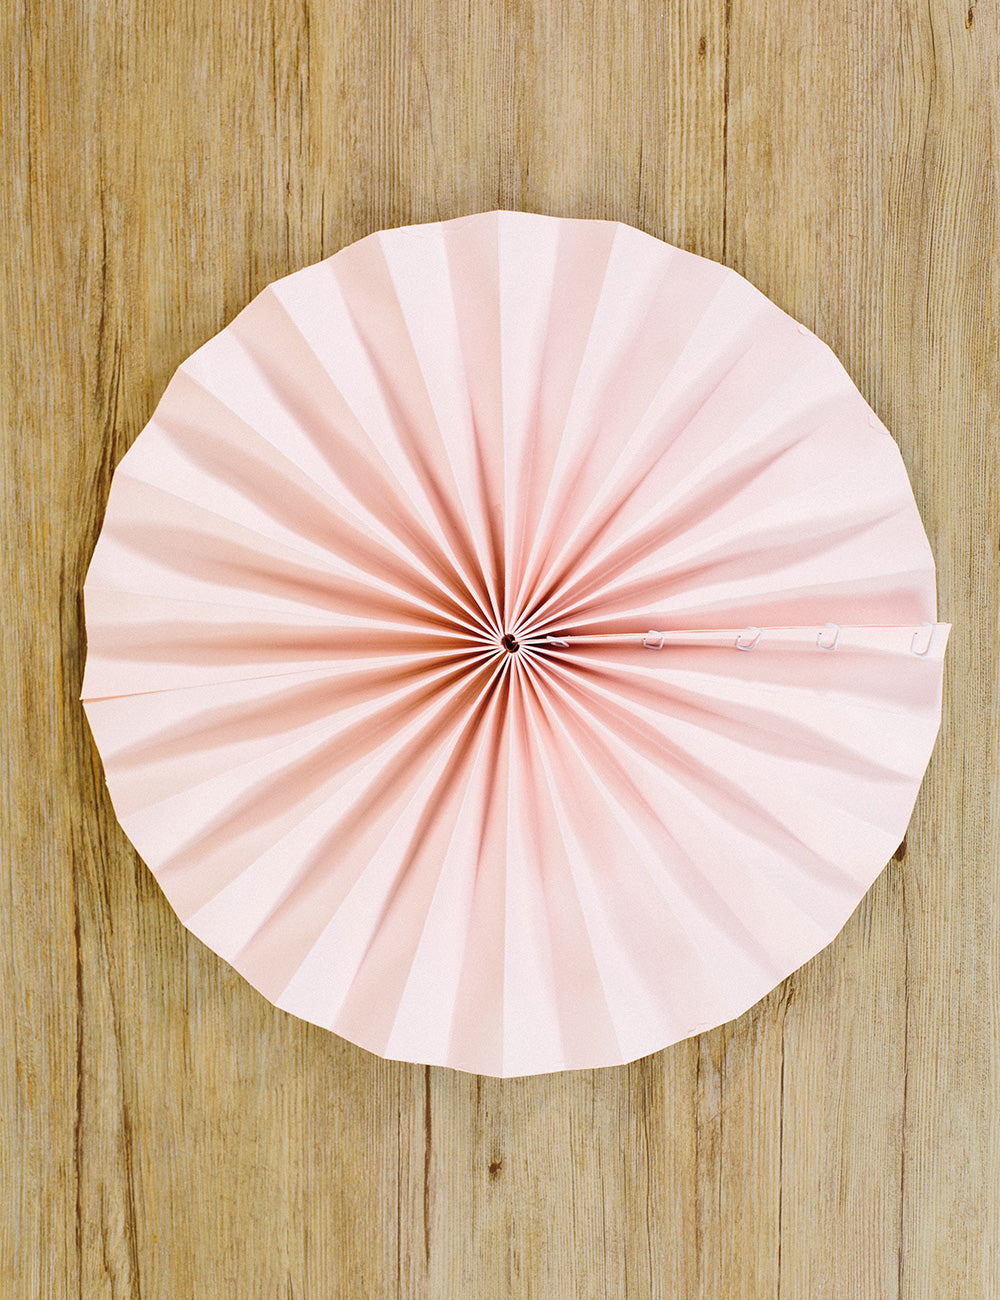
step 5
Lay your accordion flat on a table by pressing down with one hand and open it up to form a perfect circle. Join and fix the two side faces with the clips. To stick them on the wall, use double-sided tape by sticking it in the center of your fan against the wall.
I hope you like this DIY and it will serve as entertainment for the children these days of confinement at home. We would love to see your fans on social networks with the hastag #lafiestadeolivia. Big hug to each one. ❤️


Leave a comment